Creating a Basic REST API with Spring Boot: A Comprehensive Guide
Written on
Chapter 1: Introduction to REST API with Spring Boot
In this tutorial series, we will continue our exploration of creating a REST API using Spring Boot. If you're joining us for the first time, I recommend starting with the previous sections for a complete understanding.

Annotating Your Model
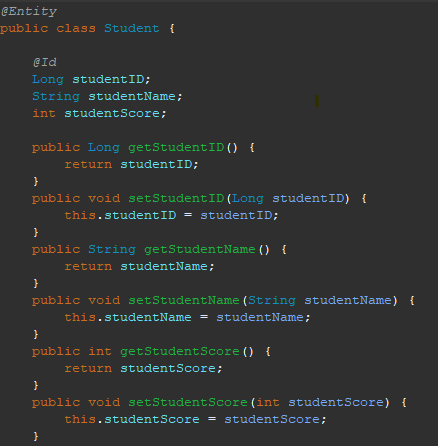
Picking up from where we last paused, we’ve already established our Student model. The next step is to annotate this model for proper storage in our database. To do this, we’ll apply the @Entity annotation above the Student class. This annotation enables the persistence of student objects in the database. For further reading on this topic, click here.
Additionally, we need to set a unique identifier for each student object to ensure accurate retrieval. We’ve created a field named studentID, which we will designate as the identifier by applying the @Id annotation on that field. After adding these two annotations, your Student model should resemble the following.

With our model now complete, you may want to verify that it is configured correctly. To do this, restart your Spring Boot application.

Important Note! Avoid simply rerunning your project, as this will leave port 8080 occupied, preventing your application from starting unless you terminate the task manually in the console. This process isn't complicated, but it's best to sidestep the hassle. Here are instructions in case you encounter this issue.
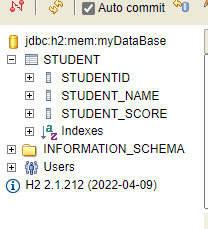
Next, navigate to your H2 database at (http://localhost:8080/h2-console) and connect using your database URL. You can view the fields we’ve created by selecting the Student table from the left sidebar dropdown.

Setting Up Your JpaRepository
Now, let’s proceed to create our JpaRepository. The JPA repository provides various tools for accessing and modifying the data stored in your database.
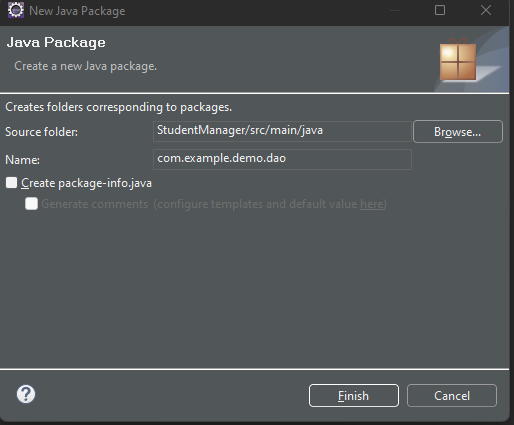
To achieve this, create a package under “com/example/demo” and name it as you wish. I will call mine “dao”, which stands for Data Access Object. Remember to prefix your new package name with a period when creating a sub-package. If you need clarification, refer back to part 2.

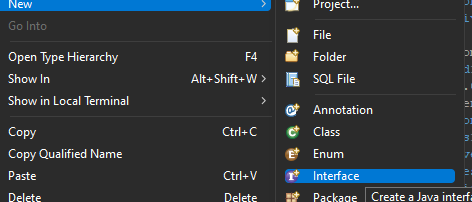
Within the newly created “dao” package, add an interface named “StudentRepo”.

Now, we’ll extend the JpaRepository in our interface. To do this, add the line extends JpaRepository after the interface name (import if necessary). The final step is to specify the type of objects the repository will manage and the data type of the unique identifier. In this case, we are working with Student objects, and the identifier's data type is Long (the field with the @Id annotation). Your interface should look like this once completed.

And that's all there is to it for our Repository! In the next installment, we will delve into the controller. See you there!
Resources
- JPA Entities
- [Link to the GitHub Repository for This Code](#)
Learn how to build a REST API in Java using Spring Boot in this comprehensive tutorial.
Discover how to create a REST API and web application with Spring Boot in this detailed guide, the third part of our series.